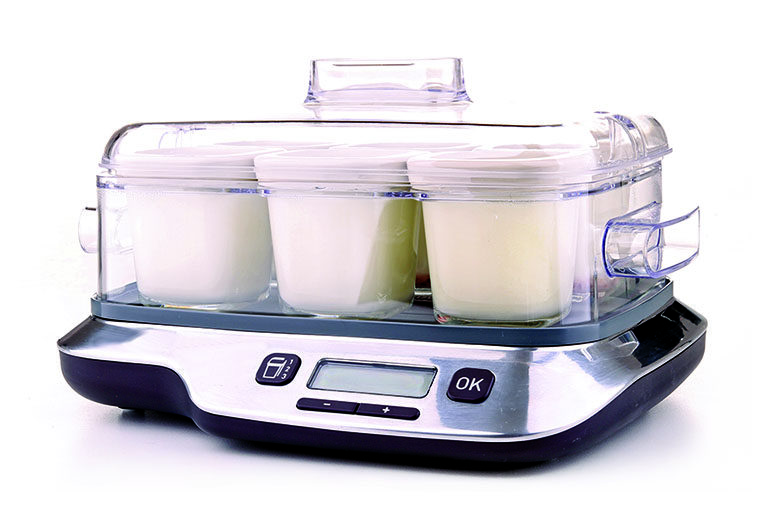
Yogurt has been a part of the human diet for thousands of years, with its name thought to originate from the Turkish word yoğurmak, meaning “to thicken, coagulate or curdle.” There are several potential reasons behind the surge in yogurt’s popularity in the United States: Some historians credit the development of the refrigerator, while others attribute it to a rise in Americans traveling to European countries where yogurt is commonly consumed.
Regardless, the intrigue and desire for yogurt led to undeniable demand in the U.S. Created in 1974, the Salton Corporation machine was one of the most popular household yogurt makers through the 1990s. However, as more commercially produced styles, flavors and brands of yogurt became widely available for purchase, this and other yogurt makers declined in popularity.
Still, some people prefer making their own creamy, probiotic-rich yogurt and others are intrigued by the DIY approach. The electric yogurt maker’s resurgence makes an otherwise tedious process child’s play.
How It Works
Generally, yogurt is made by heating milk and maintaining it at a certain temperature, adding lactic acid-producing bacteria and cooling before flavoring or packaging.
Countertop yogurt makers operate in a similar fashion but on a much smaller scale. Milk is heated in a saucepan to a specified temperature, usually around 185 degrees Fahrenheit, and allowed to cool to about 110 degrees Fahrenheit. A bacterial culture starter containing at least Lactobacillus bulgaricus and Streptococcus thermophilus or a scoop of store-bought plain yogurt is mixed into the milk, then added to the yogurt maker vessel, which holds the mixture at the correct temperature range for eight to 12 hours to ferment. This time can range depending on the yogurt maker model, but in most cases, the fermentation process can be completed overnight. In general, the longer yogurt ferments, the tangier it will be. After fermentation, yogurt should be refrigerated for at least three hours before it’s eaten.
Model Types
Yogurt makers come in different models, including a single vessel or several individual containers. The single vessel yogurt maker prepares yogurt in one container, which can be stored as is or separated into individual containers upon refrigeration.
Some yogurt makers come with individual glass containers, to which the yogurt mixture is added prior to the prolonged temperature-controlled fermentation period. This option allows users to conveniently flavor and enjoy yogurt in individual portions after the yogurt has been made.
Yogurt Variations
Making yogurt at home is both economical and customizable. With most yogurt makers, you can use different types of pasteurized milk such as cow’s milk and goat milk, and non-dairy alternatives such as soy, almond and coconut-based alternatives. Milk with a higher fat content produces firmer yogurt. Refer to the yogurt maker’s owner manual for specific instructions and cook times for each type of milk or non-dairy alternative, since different types of bases require different bacterial cultures, ingredients, temperatures and fermentation times.
To make Greek-style yogurt at home, strain homemade yogurt to remove a portion of the whey, which results in a thicker texture with the same tart flavor as traditional yogurt. Line a colander with cheesecloth and set the colander in a large bowl. Add unflavored homemade yogurt to the colander, cover with plastic wrap and refrigerate for eight to 24 hours, depending on the desired thickness.
Homemade yogurt can be flavored with fresh fruit, spices, jams or syrups after fermentation. Yogurt in general has a shelf life of one to two weeks, if handled and stored properly. Always refer to the machine’s manual for the best results.
Care and Storage
Prior to cleaning, yogurt makers should be unplugged and allowed to cool completely. Wash and dry yogurt maker containers and vessels immediately after use to prevent lingering odors or flavors and for proper food safety. Most vessels and containers can be washed by hand with hot, soapy water, then rinsed and dried. Refer to the owner’s manual to verify if any or all parts are dishwasher-safe.
The base of the yogurt maker can be wiped clean with a damp cloth and allowed to dry completely. When not in use, yogurt makers can be stored on a countertop or in a clean and dry cabinet or pantry.
References
EuroCuisine: EuroCuisine Automatic Yogurt Maker Operating Instructions. Los Angeles, CA. Accessed January 6, 2020.
EuroCuisine: EuroCuisine User Manual 2 Quarts Yogurt Maker. Los Angeles, CA. https://www.eurocuisine.net/manuals/EYM260.pdf Accessed January 6, 2020.
Fisberg M, Machado R. History of yogurt and current patterns of consumption. Nutrition Reviews. 2015; 73:4–7. Accessed January 6, 2020.
Salton Yogurt Maker. National Museum of American History website. Accessed January 6, 2020.
Storebound: DashGo Yogurt Maker Welcome Booklet. New York, NY: StoreBound LLC; 2013. Accessed January 6, 2020.
The story of yogurt: Canadian Goodness. Dairy Farmers of Canada website. Accessed January 6, 2020.


